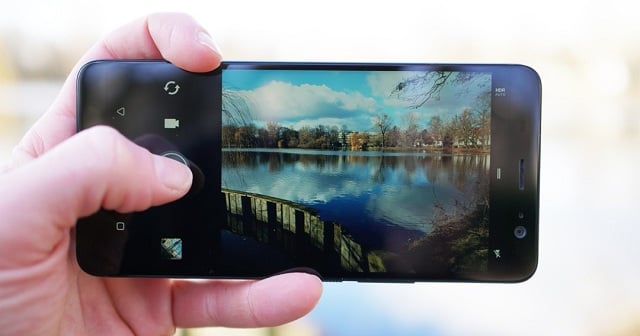
Smartphone cameras are improving day in and day out, with better sensors and smarter image processing the world of cameras is changing on a daily basis. Other than that the Multi-Camera generation phones have also pulled of something amazing for the consumers with better and more functionality in terms of photography. So let us now look at some of the amazing photography tips one should always keep in mind.
Take tons of photos.
So according to experts the difference between a good and an average photographer often comes down to the sheer volume of photos taken. I mean there are going to be a few decent snaps after taking 300 photographs right? So next time you want to take a photo try to capture a few more just in case. You can slightly change the focal point or angle with each photo for a better result.
Try Burst Mode.
Burst mode is extremely popular for photos of kids and group shots so there is always someone asking for more shots because of the sheer movement taking place amongst the people. This gives you many options to decide and this mode captures differences of milliseconds so it can be a very effective tool
Learn all about your camera app!
Whether you have a new phone or an old one it is always useful to spend some time to look in to every little detail your phone app can offer you and after all you can never really improve your phones camera capability if all you do is shoot in Full-Auto mode. Sometimes it’s as easy as to jump in to a preset camera mode like light painting or in Nokia’s case the bothie mood. You can also set the exposure to match conditions etc.
Download another Camera App!
The preset Camera App is usually not the best choice you can have. If you want you can choose from loads of different third party Camera Apps on the Play Store. These apps usually almost give you everything from granular controls to more advanced modes. You want manual controls and a histogram then try Footej Camera or if you’re more selfie-centered then you can try the Candy Camera and even if you don’t care for features these third-party apps can usually spit out better photos.
Must Read: Government Will Impose Duty on Unregistered Phones
Is Flash even necessary?
Phones have made a lot of progress when it comes to low-light photography, so you may not need Flash in many situations and many of today’s flagship phone models are capable of good shots without Flash. Now you may certainly encounter moments in which Flash may be deemed necessary but do try something different sometimes a simple feature as the Night Mode can make a huge difference.
Learn to use the Sun.
Another important rule is to not shoot directly in to the Sun when taking photos of people. There are many exceptions however but moreover try your best to have the Sun complement the photo and what we mean by this is to have the sun lighting up your objects or people when taking a photo. Furthermore you may also want to take a photo in the golden hours or what you may know as the Sun Rise or the Dawn. Do this and you may very well get some amazing colors all naturally occurring ones too.
Turn on the Grids in your Phone
So the most basic and viable option in any and every phone will have to be the Grid mode this is also the Rule of Thirds and this calls for you to divide your camera in to nine sections. This can enabled via an option in your camera app which may be called the camera grid. So the rule wants the person to simply use the grids in such a way that the objects should be ideally positioned at the intersection points of these lines which also helps you keep things straight. So by abiding to the rule you may very well get good photos in the process.
Use and play around with the HDR Mode
Every phone has the HDR mode embedded in its system which basically combines multiple exposures’to form a better image. By taking this approach you can be able to capture more details in the shadows and in the bright light. HDR works best with landscape photography where the combo of bright skies and dark shadows can make photography undesirable but if you turn on the HDR mode the chances of capturing a good photo in the given conditions very much increase.
Get to Know the Manual mode in your device.
This may seem to be one of the most complicated features in your phone for the uninitiated. The easiest way to learning how to use this mode will be to spend time with it basically experimenting. The shutter speed controls how long your shutter is open for, longer is better for dark. ISO is a measure of light. A lower ISO is more suitable in Daylight while higher ISO is suitable for night time. Aperture size is basically how big the hole in the shutter is which allows light to go through the Lens and on to the sensor. All in all these features are directly proportional to one another meaning that a change in one will also require a change in the other.
Get a Tripod for long exposure/light painting shots.
One of the best options available to us to capture photos which require long exposure shots is to purchase a tripod stand which allows you to perfectly stabilize the long exposure images. This tripod can also be handy if your phone is subject to blur at night. Furthermore if you can also try to get one with bendy legs so you may wrap it around a fence and use the timer to capture amazing group shots.
Use focus peaking if available on your phone.
You can simply put the peaking outlines on the well-focused areas of your scene in a bright color to make your focal points more visible. This mode essentially tells you where your camera is focusing , not just on your subject but also on the other objects you are trying to capture in the same focal plane
Always Wipe the Lens clean before shooting photos!
This is one of the easiest ways for achieving better results. It’s always important to give the Lens a wipe before capturing any photos but your sleeve may not be the best option so it is recommended to carry a micro-fiber or lint-free cloth with you. Once you do this occasionally you will actually develop a habit to do this every time and in turn the results dramatically become more vibrant.
Use Google Photos Auto-Fix
Google Photos is not just a photo-backup service; it also has a variety of photo editing tools as well. These tools allow for you to adjust everything from lighting to colors. But ignore all these features the most important tool in Google Photos is probably the Auto-Fix option, Use this and your likely to get a better adjusted photo in the process.
Download a Different Photo Editor
The Snapspeed application is one of the best photo-editing applications available on Play Store which ranges from providing RAW editing and S curves support to healing tool and white balance. It also has the option of Auto-Fix as mentioned in the previous point.
Don’t forget one of the most important yet ignored feature, Cropping
Today’s phones are packed with loads of megapixels and can handle cropping easily without breaking any pixels. So do not be afraid to shoot wider photographs than you want as you can simply crop out the unnecessary bit after taking the photo by cropping that bit out of the frame. You can often get better results by simply cropping later.
Add a few Diagonal lines to your image.
One may not expect to hear about this tip but looking out for diagonal lines and keeping an eye out for things like the roads or painted lines and buildings running diagonally when taking your snap can often result in more depth being added inside your picture. Getting a better a position to take an advantage of these diagonal lines can also help the viewer direct his eye towards the subject. You can also try tilting your camera to 45 degrees so the objects mentioned are running diagonally.
Finally one you know that these tips aren’t based on facts but mostly on experience. It is not necessary that all these tips may suit one person but the main purpose of such tips is to help you think out of the box and try something new which often results in amazing photos.


